This post may contain affiliate links. Please read our disclosure policy.
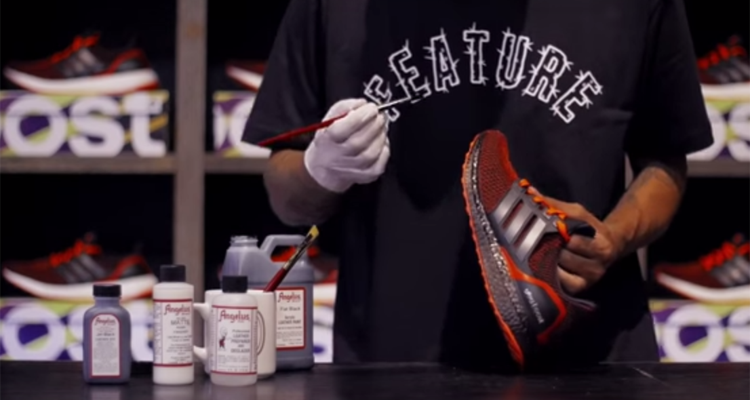
Over the weekend, adidas Boost launched with color for the first time and boy did pairs go fast. While Boost cushioning in a pantone other than white has long been desired, DIY methods have offered an alternative for the adventurous. Today, Nevada-based boutique Feature LV shares their secrets on how to make your Boost soles black. Peep the video above to find out and check out their step-by-step guide below.
Step 1 – Prepare The Midsole
Pour some Angelus Deglazer onto a cotton ball or a white rag. Using the cotton ball, rub gently against the midsole until you see the gloss finish on the midsole become dull; making the midsole a matte white color. (Don’t use too much Deglazer and do not rub to hard or else it will eat away at your sole). Let the shoe dry for 5 minutes then proceeded to the next step.
Step 2 – First Coat Of Paint
Start to apply the Angelus Black Leather Dye using a small paint brush until the surface of the midsoles is completely black. For added precaution, apply painters tape over any Primeknit surface that you don’t want painted on. (To ensure a better turnout, apply 2 coats of Black Leather Dye. Let the first coat dry for 10 minutes, then proceed to apply the second coat.)
Step 3 – Add A Matte Finish
Apply 2 coats of Angelus Flat black paint with a medium sized brush, using the same technique as in step 2. Wait 10 minutes after each coat is applied before applying the next coat. (OPTIONAL: To add a semi-glossy finish apply a coat of Angelus Matte Acrylic Finisher using the same technique as the previous two steps.) Let the paint set for 24 hours before you wear.